- CAD Plotters
- Wide-Format Photo, Fine Art & Graphic Printers
- HP Latex, Outdoor, Signage, Wall Paper Printers & Cutters
- Wide Format Ink & Media Supplies
- Multi Functional Printers & Plan Copiers
- Large Format Scanners
- Finishing - Large Format Paper Folders, Trimmers, XY Cutters & Laminating
- Canon A4 and A3 Copier Paper
- Canvas, Stretcher Bars & Laminate
- Fabric Printers
- 3D Printers
- Bricsys BricsCAD® Software
- Colour Management & RIP Software
- Plotter Warranties
- Storage & Filing Systems
- OFFERS
Why use plot-IT?
- Est since 1965
- Group turnover - £15 million
- 5 UK offices with over 100 staff
- HP Designjet Warranty Provider
- Autodesk Gold reseller
- Canon Elite Partner
- Stratasys - Gold Partner
Search by Brand


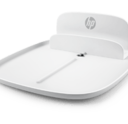
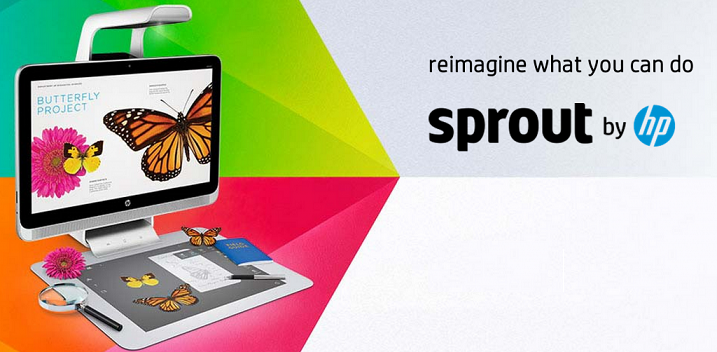
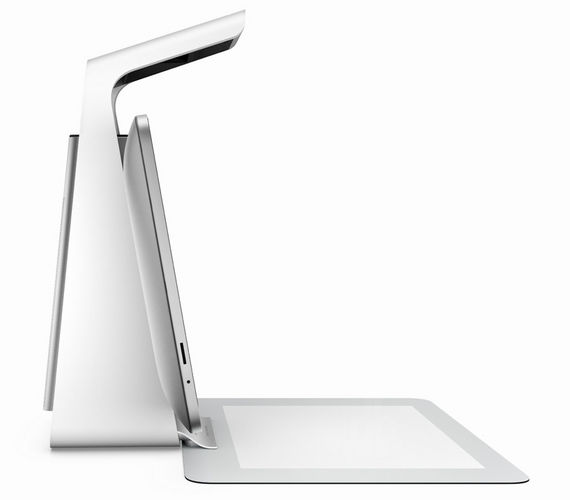
Sprout by HP
HP Sprout J4W72AA
-
Please contact us on 01905 454 598 for a quote
- Description
- Sprout Specs
- Working with different layers
- Navigation Menu
- Document Capture
- Object Capture
-
Description
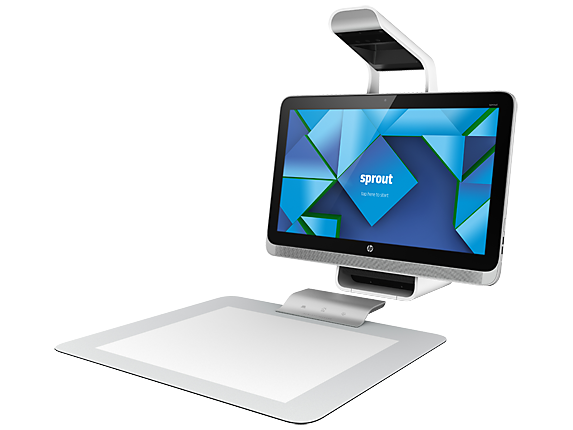
HP Sprout is a fully functional creative workstation with a built-in 3D scanner and touch mat. The "illuminator" column contains Projection, Cameras and with the capibilty to scan 3D Objects
Sprout by HP at a Glance- Dual-screen Experience: A workspace designed for creative expression and human interaction with an integrated vertical HD touch screen coupled with a 20 point capacitive touch mat.
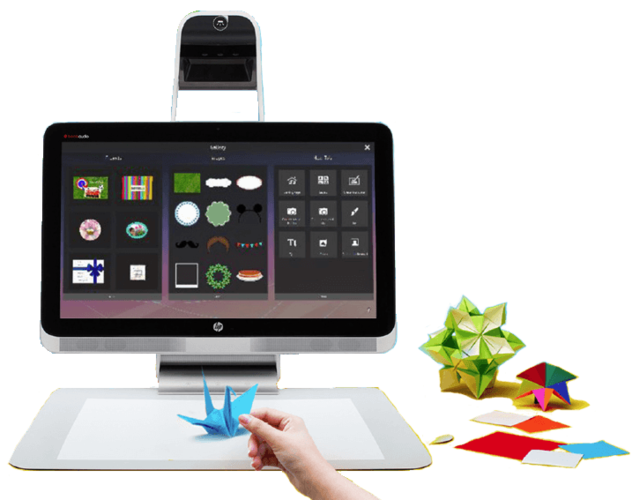
- The Sprout Illuminator: A projection system that scans and captures real-world objects in 3D, allowing the user to immediately interact and create.
- HP Workspace: A software platform built expressly for Sprout to take full advantage of the dual-screen experience to make working and creating seamless, intuitive and engaging.
- True Remote Collaboration: The way collaboration should be. An interface that advances how users work, collaborate and share, with simultaneous visual and workspace connectivity, allowing concurrent creativity and content manipulation.
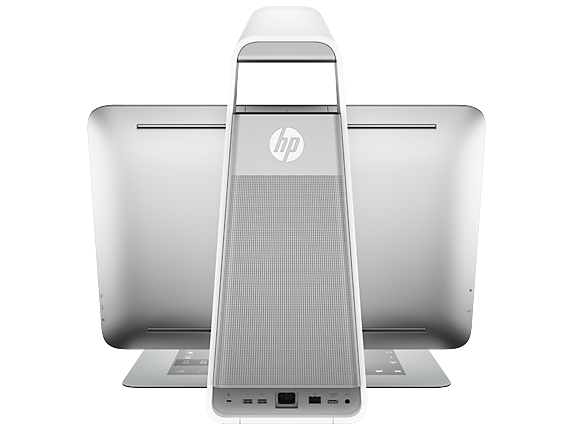
- Advanced Platform: A next-generation computing platform featuring a powerful 4th generation Intel i7 Processor, 1TB of storage in an easy-to-use dual-screen interface, and a Windows 8.1 multi-touch experience.
Specs At a Glance, check the spec Tab for detailed information....
- Windows 8.1 64
- 4th generation Intel® Core™ i7-4790S Processor
- 8 GB 1600 MHz DDR3 (2 x 4 GB)
- 23" diagonal FHD WVA touch-enabled LED-backlit LCD (1920 x 1080)
-
Sprout Specs
HP Sprout specifications
Operating System Windows 8.1 HP Illuminator HP Illuminator, powered by the HP DLP Projector, the HP High-Resolution Camera with up to 14.6 megapixel resolution and the Intel® RealSense™ 3D Camera for instant capture of 2D and 3D objects, along with an LED desk lamp HP Touch Mat 20" diagonal, 20-point touch-enabled touch mat with an ultra-resistant top coating Stylus Adonit Jot Pro stylus to write and draw comfortably. It can be attached magnetically to the upper-right side of the Sprout display. Processor 4th generation Intel® Core™ i7-4790S Processor Graphics NVIDIA GeForce GT 745A with 2GB DDR3 dedicated memory Integrated display 23" diagonal, 10-point touch-enabled, Full HD (1920x1080) Wide Viewing Angle, White-LED backlit LCD Display Memory 8GB PC3-12800 DDR3-1600 SDRAM memory2x4GB (expandable to 16GB) Hybrid drive 1TB SATA 6G Solid State Hybrid Drivewith 8GB flash acceleration cache offers SSD-like Speed & HDD capacity Webcam HP High Definition 1MP Webcam Sound DTS Sound™ Wireless 10/100/1000 Base-T Network and Integrated Bluetooth® 4.0 and Wireless LAN 802.11a/b/g/n featuring Dual-band (2.4GHz and 5GHz) 2x2 MIMO technology USB ports Dual USB 2.0 ports and dual USB 3.0 ports, including a powered port to charge phones or other USB devices Memory Card Reader HP 3-in-1 Media Card Reader Supports SD, SDHC, SDXC Keyboard and mouse Premium wireless chiclet-style keyboard with volume control, Windows 8 hot keys and optical mouse Sprout Workspace The app for capturing, creating, and sharing your ideas -
Working with different layers
In Sprout Workspace, images, ink, and text exist in separate layers, so that objects can be in front of or behind other objects. You can move these objects to place them in front of or behind another object.
Use the following steps:
In Workspace, select the image you want to move. A blue outline appears. (A red outline indicates that the image is locked).
Figure 1: Selected image with blue outline

Tap To Front
 so the object appears in front of the other objects.
NOTE:With multiple objects, tapping To Front moves the selected object to the top layer.
Figure 2: Moving an object to the front

To move the object to the back, tap To Back
 so the object appears behind the other objects.
NOTE:With multiple objects, tapping To Back moves the selected object to the bottom layer.
Figure 3: Moving an object to the back

-
Navigation Menu
The area at the top left of the Workspace is the HP Sprout navigation menu. Tapping a menu item allows you to perform the following functions:
Capture an object on mat 
Open Gallery 
Preview an image or project 
Capture the monitor screen 
Open Sprout Share Hub 
Go to the Internet 
Go to My Room by HP -
Document Capture
Capturing a document
With Sprout, you can also capture documents. Use the following steps:
On Sprout Home screen, touch Doc Scan.
Figure 5: Doc Scan on Sprout Home Screen
Place the document near the center of the mat. When it is lying flat and properly positioned, tap the Capture button.
Figure 6: Tapping the Capture butto
Sprout takes a picture with a flash, performs some processing, and then displays the final version. You can now remove the document. The digital version appears on the mat.
Figure 7: Capturing a document
When you are satisfied with the scan, tap the blue check to accept it and add it to your Document Gallery. You can also tap the red X to cancel the scan or the plus sign to scan additional documents.
NOTE: If you scan additional documents, they will all be added to the documents gallery. When performing multiple scans, if you cancel the last capture, then only that capture is cancelled. The other captures are added to the documents gallery.
Figure 8: Tapping the blue check to accept the scan

-
Object Capture
Capturing an object
On Sprout Home screen, touch Capture.
Figure 1: Capture on Sprout Home Screen

Place the item for capture on the touch mat using the following guidelines.
Face your objects towards the monitor so the camera gets the best capture.
Place the object close to the center of the mat.
If capturing multiple objects, make sure you have ample space between objects and that the shadows do not touch, so they are seen as two separate objects rather than one conjoined object.
When capturing metal objects, touch Capture first and then place the item on the mat. If a metal item is placed on the mat before the Capture button is pressed, Sprout may register it as a touch on the mat, and the Capture button might not work.
When capturing many objects at the same time, it will take longer to completely process the capture.
Tap Capture. There is a 3-second countdown, and then the picture is taken. After the picture is taken, a digital image of the object appears on the mat and Sprout performs some additional processing.
Figure 2: Tapping the Capture button

Make sure that you like the captured image displayed on the screen, and then remove the object from the touch mat.
Tap the blue check to accept the image, the red X to cancel, or the plus sign to scan another object.

NOTE: If you tap the plus sign and scan additional objects, they will all be added to the image gallery. When performing multiple scans, if you cancel the last capture, then only that capture is cancelled. The other captures are added to the image gallery.
Figure 3: Accepting the image

Your captured image is saved in the Images section of Gallery for use anytime.
Figure 4: Captured image saved in Images