


UltiMaker Adhesion sheets 2+ Connect & S3 Range (25 Pack) (2197):
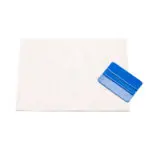
Contains 25 adhesion sheets designed to enhance adhesion to the build plate for most materials, offering an alternative to glue sticks. These sheets are reusable and can be applied multiple times. Proper application is crucial to avoid air bubbles and ensure a level printing surface.
Using an adhesion sheet is an effective method of ensuring your 3D print adheres to the glass build plate, producing consistent high-quality results. Learn how to apply it correctly, prevent air bubbles, and ensure a smoother, flatter surface.
Adhesion sheets are available in two sizes. The part numbers, sizes, and compatibility are listed below. Both packs contain 25 sheets and an applicator.
- Part number 2197 – 263 x 210 mm. Compatible with the UltiMaker 2+ Connect, UltiMaker 2 series, UltiMaker 3 series, and UltiMaker S3.
- Part number 210702 – 363 x 260 mm. Compatible with the UltiMaker S5.
MATERIAL COMPATIBILITY:
The adhesion sheets can be used instead of a layer of glue with almost all UltiMaker 2.85 mm materials, although for some materials the benefits are greater than for others:
- Highly recommended: Especially for UltiMaker PP, the use of an adhesion sheet is highly recommended to ensure optimal adhesion. Other high-temperature materials such as PC and CPE+ also benefit from the adhesion sheets.
- Not recommended: For UltiMaker TPU 95A, the use of an adhesion sheet is not advised. This material sticks too well to the sheet and becomes almost impossible to remove.
- Not validated: The use of the adhesion sheets in combination with UltiMaker PETG and UltiMaker PET CF has not been fully tested and validated by UltiMaker.
APPLYING THE ADHESION SHEET:
To apply the adhesion sheet to the glass plate, take the following steps:
- Remove the glass plate from the printer by opening the build plate clamps at the front of the build plate, then gently sliding the glass plate out of the printer.
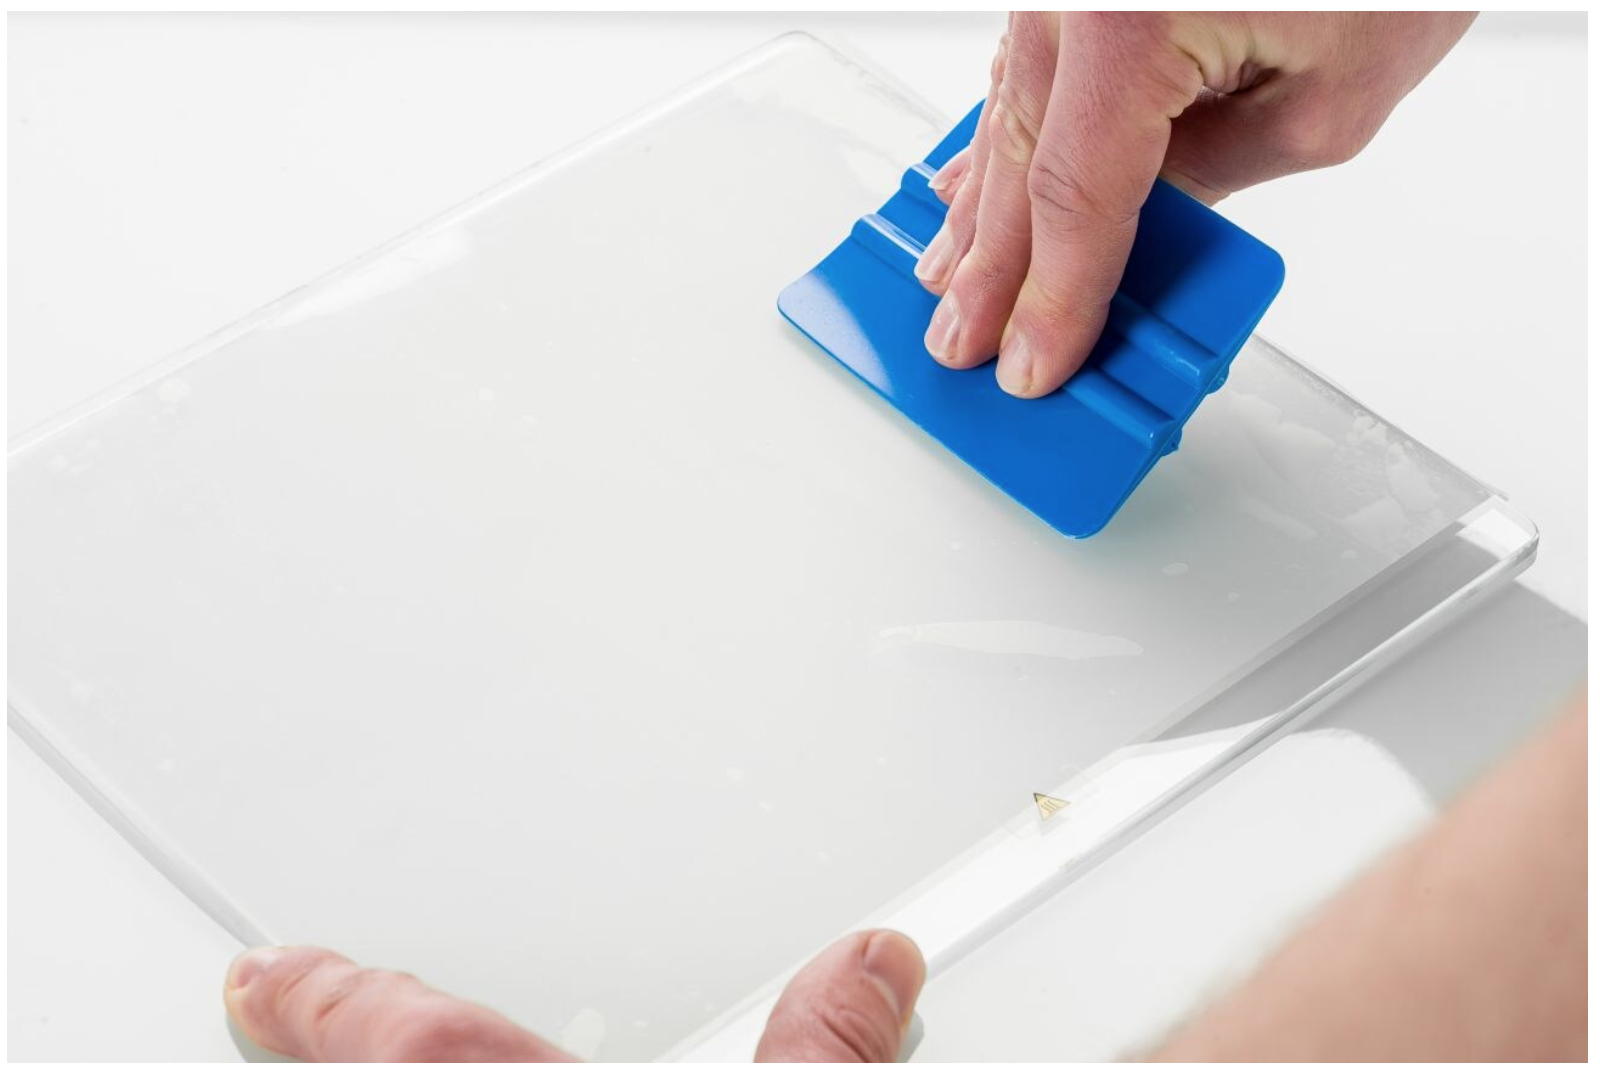
- For the best results, wet the glass plate with water and (optionally) a small amount of (dishwashing) soap. Make sure that the warning symbol on the glass build plate is facing upwards.
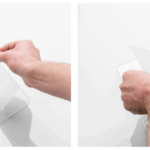
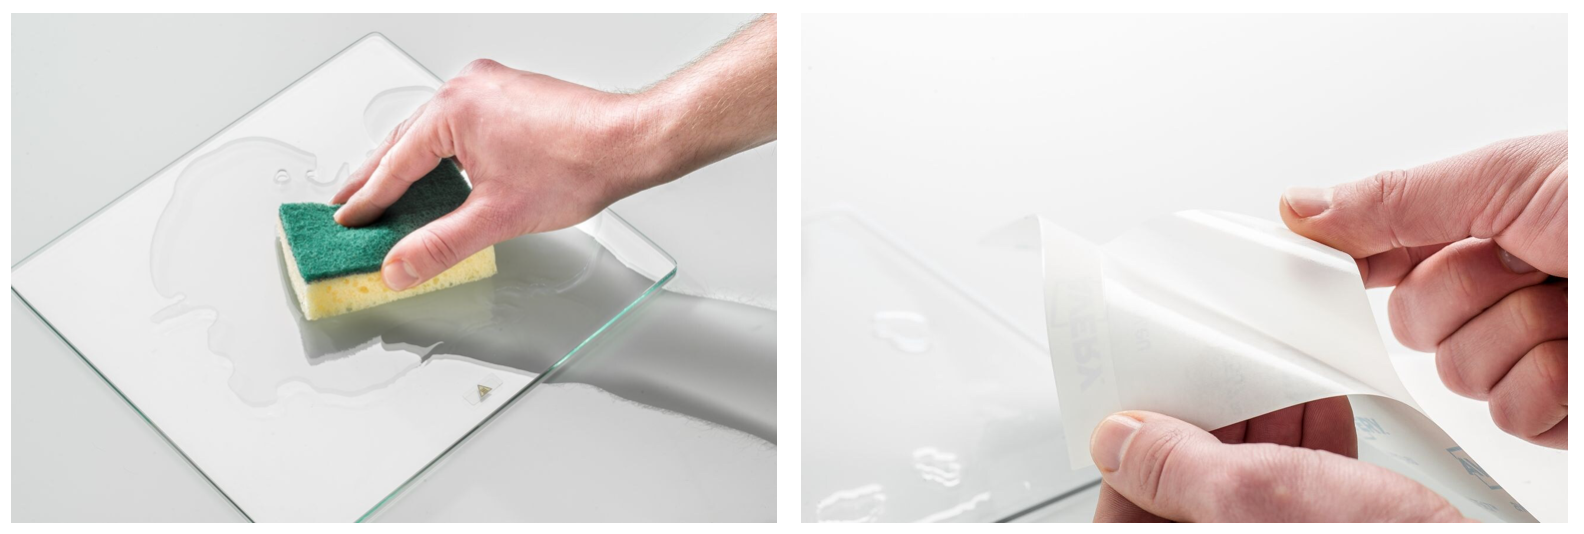
- Remove the back liner from the adhesion sheet.
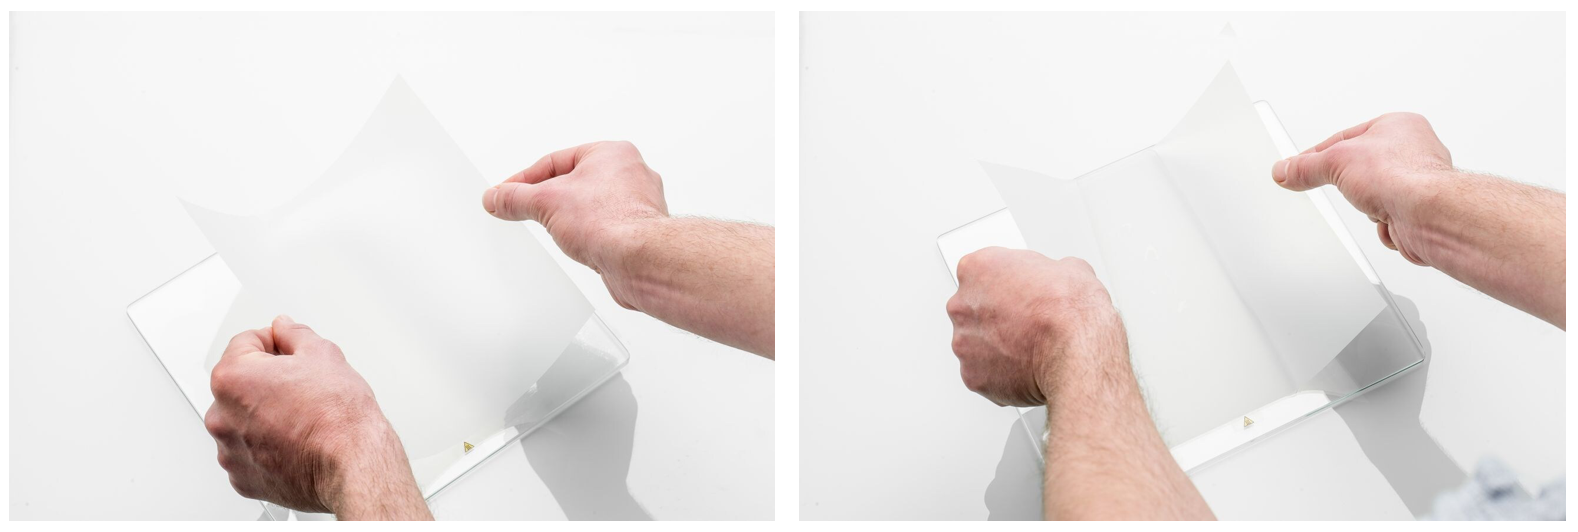
- Slowly apply the adhesion sheet. Start in the middle and then lower the adhesion sheet onto the rest of the glass plate.
- To reduce the number of air bubbles, use the adhesive applicator to sweep the water outwards from underneath the sheet, starting at the center. Be careful not to tear the sheet. Air bubbles trapped under the sheet can distort the first printed layer. If the bubbles cannot be removed using the applicator, you can pop the bubbles with a needle after applying the sheet. Push the air out of the hole using the applicator.

- Place the glass plate upside down on a flat surface and cut off the excess of the adhesion sheet with a sharp knife.
- Dry the plate with a clean (microfiber) cloth. Take care not to damage or displace the newly applied adhesion sheet.
- Place the glass plate back in the printer and secure it with the build plate clamps. Heat up the build plate to 100 °C so the remaining water under the sheet can evaporate.
REMOVING THE ADHESION SHEET:
The adhesion sheet can be used multiple times, but once it has been damaged, you may need to replace it. To remove the adhesion sheet from the glass plate, take the steps below. When following these steps, the chance of ripping the sheet and/or leaving a sticky residue on the glass plate is minimized.
- Open the build plate clamps at the front, slide the glass plate forward, and remove it from the printer.
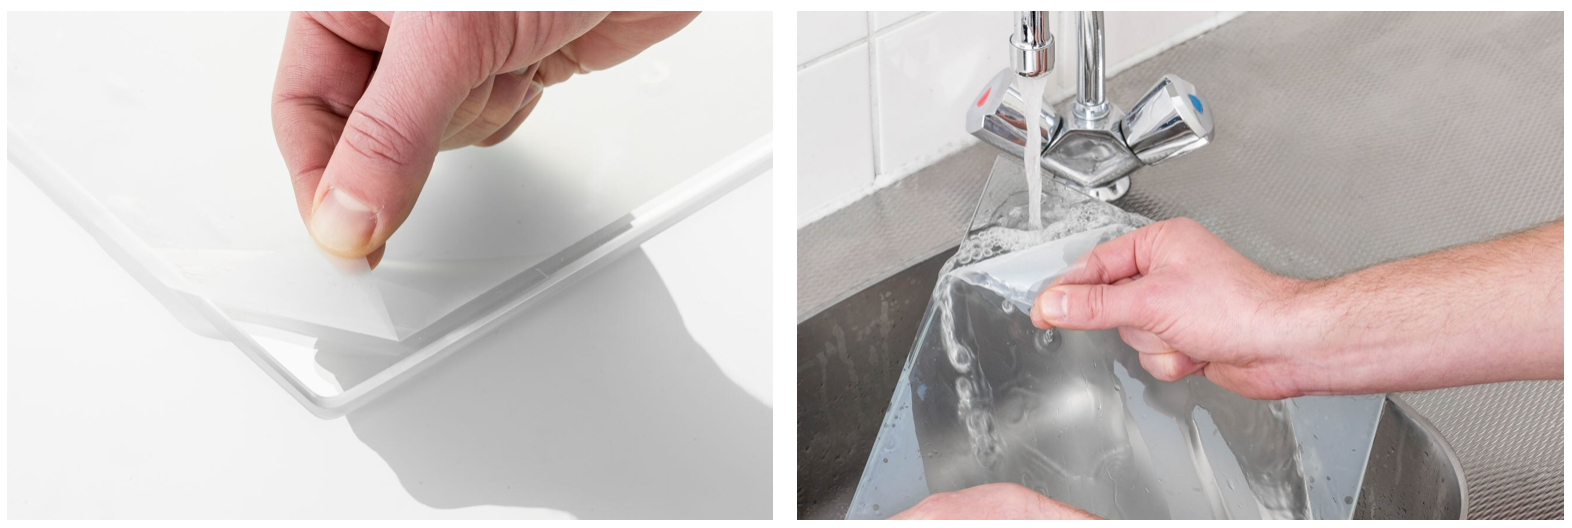
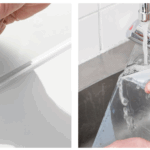
- Take one of the corners of the adhesion sheet and peel it back from the glass plate slightly (only a few cm).
- Hold the glass plate under a tap, with the corner of the sheet that you have peeled back facing up.
- Let the water run under the adhesion sheet while slowly pulling the sheet off perpendicular to the glass plate.
- Continue switching to a different corner of the adhesion sheet to pull it off completely.
Tip: Remove any glue residue that was left on the glass plate with a sponge, water, and soap.