


C12C815331 Replacement auto cutter blade for the Epson Stylus Pro and SureColor wide-format printers listed.
Epson Stylus Pro:
WT7900
Epson SureColor:
SC-P6000, SC-P7000, SC-P7300, SC-P7500, SC-P8000, SC-P9000, SC-P9300 SC-P9500 Printers
How to Install the Epson AutoCutter C12C815331
1. Prepare the Printer
- We recommend the use of safety gloves
- Ensure the printer is powered on and in a ready state.
- Remove any loaded media to prevent interference during the installation process.
2. Access the Cutter Compartment
- Locate the cutter compartment on your printer. This is typically found on the front or side panel, depending on your printer model.
- Open the compartment to expose the existing cutter unit.
3. Remove the Old Cutter (if applicable)
- If replacing an old cutter, carefully detach it by loosening any securing screws or clips.
- Gently remove the old cutter from its housing.
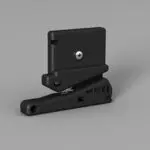
4. Install the New AutoCutter
- Unbox the new C12C815331 cutter, handling it by the edges to avoid contact with the sharp blade.
- Align the new cutter with the mounting points in the compartment.
- Secure the cutter by tightening any screws or clips that hold it in place.
5. Calibrate the Cutter
- Access the printer’s control panel and navigate to the maintenance or setup menu.
- Select the option to calibrate or test the cutter. This ensures that the new cutter is properly aligned and functioning correctly.
6. Test the Installation
- Load a test sheet of media into the printer.
- Initiate a print job that includes a cut operation.
- Observe the cutter’s performance to confirm clean and accurate cuts.
Important Installation Tips
- Handle with Care: Always handle the cutter by its edges to avoid injury from the sharp blade.
- Proper Alignment: Ensure the cutter is correctly aligned during installation to prevent operational issues.
Regular Maintenance: Regularly check and clean the cutter to maintain optimal performance